
Data binding is a fundamental concept that enables developers to create dynamic and responsive user interfaces. In Lightning Web Components (LWC), data binding allows developers to connect a component’s properties with the corresponding UI elements. In this article, we will learn data binding in LWC, focusing on three key aspects: one-way binding, two-way binding, and computed properties. We will explore each of these techniques in detail, providing practical examples and clear explanations of how they work.
First, we will start with the concept of data binding in LWC. We will then dive into one-way data binding, explaining how it allows changes to a component’s property to update the corresponding UI element, but not the other way around. After that, We will see some examples of how to use one-way data binding with different types of UI elements.
Next, we will cover two-way data binding, which allows changes to the property to automatically update the UI element, and changes to the UI element to update the property. We will see how to create two-way data bindings using the onchange event.
After understanding one-way and two-way data bindings, we will compare both of them. We will understand the difference between one-way and two-way data binding in LWC.
Finally, we will discuss computed properties, which are a powerful tool for creating complex data bindings and performing calculations based on other properties. We will see examples of how to use computed properties.
By the end of this article, readers will have a clear understanding of the different types of data binding in LWC, and how to use them to create powerful and responsive web applications. Whether you are a beginner or an experienced developer, this article will provide valuable insights and practical examples for mastering data binding in LWC.
One-way data binding in LWC
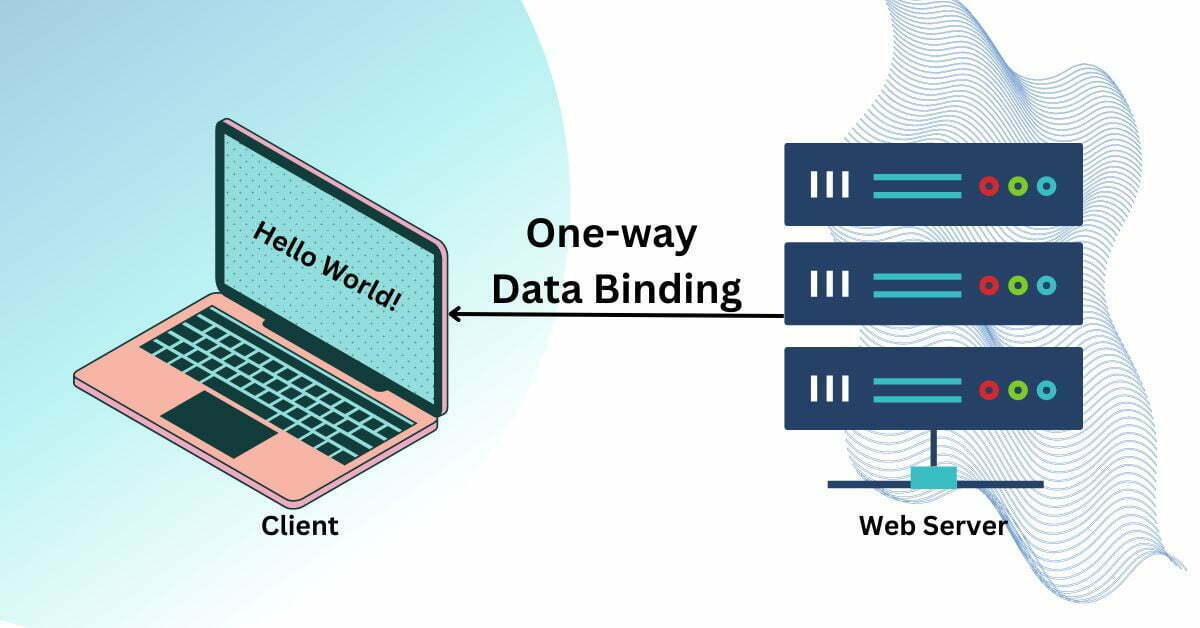
In One-way data binding changes to a component’s property update the corresponding UI element, but changes to the UI element do not update the property. This means that the value of the UI element is derived from the value of the property, but the two are not directly connected.
In LWC, we can implement one-way data binding by using curly braces {} to bind a property to a UI element. This allows the property value to be displayed in the UI element, and any changes to the property will automatically update the UI element. But any changes from UI, will not update the property.
For example, let’s say you have a component with a property called message that you want to display in an lightning-card element. You can use one-way data binding to display the value of the message property in the lightning-card element:
<template>
  <lightning-card title="My Card" icon-name="standard:card">
    <p>{message}</p>
  </lightning-card>
</template>import { LightningElement, track } from 'lwc';
export default class OneWayDataBinding extends LightningElement {
message = 'Hello, world!';
}In this example, the value of the message property is the <p> tag using one-way data binding. When the component is rendered, the message property is evaluated and its value is displayed on the UI. If the value of the message property changes, the UI element is automatically updated with the new value.
One-way data binding can also be used with other types of UI elements, like input fields and buttons. In each case, the property value is bound to the UI element using curly braces, and changes to the property will update the UI element. However, changes to the UI element will not update the property.
Two-way data binding in LWC
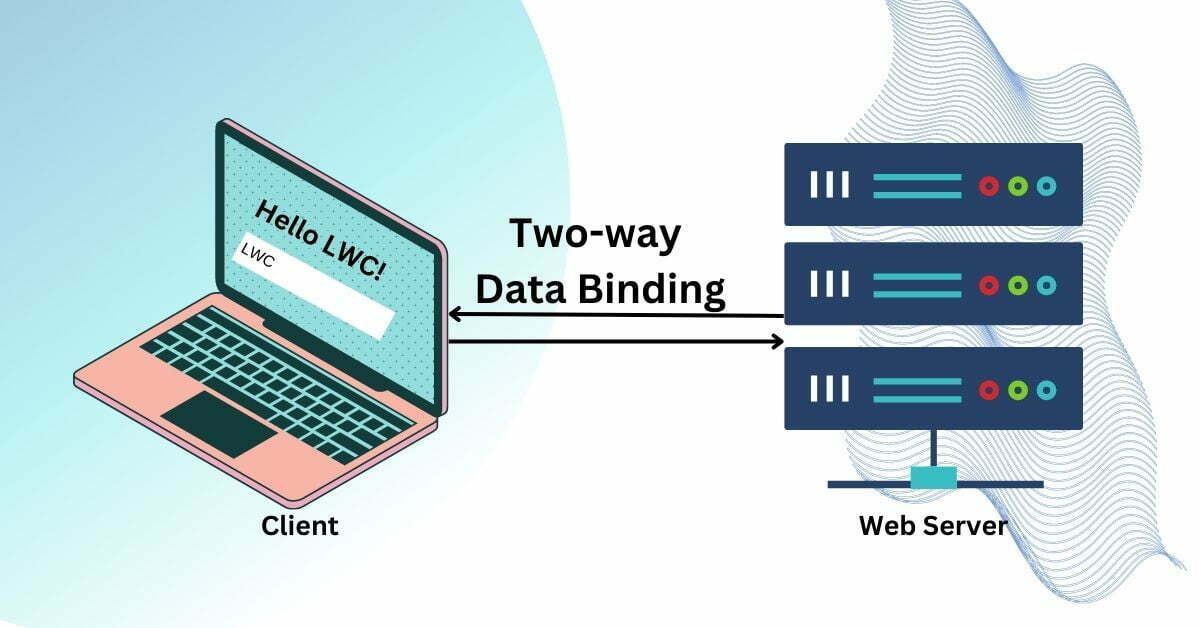
In two-way data binding, it allows changes to a component’s property to automatically update the corresponding UI element, and vice versa. This means that when a user interacts with the component, such as by typing in the input field or selecting an option from a combo box, the corresponding property in the component is automatically updated with the new value.
Earlier in LWC, two-way data binding is achieved using the @track decorator and the onchange event. The @track decorator was used to marking a property as reactive, which means that changes to the property will trigger a re-render of the component. But it was changed after Sprint 20 release. Now, there is no need to use @track decorator.
The onchange event is used to listen for changes to the UI element and update the corresponding property in the component.
For example, let’s say you have a component with an input field that allows the user to enter their name. You can use two-way data binding to automatically update a name property in the component with the value entered by the user:
<template>
  <lightning-input label="Name" value={name} onchange={handleNameChange}></lightning-input>
</template>import { LightningElement, track } from 'lwc';
export default class TwoWayDataBinding extends LightningElement {
name = 'Abhi';
handleNameChange(event) {
this.name = event.target.value;
}
}In this example, the value attribute of the lightning-input element is bound to the name property using two-way data binding. When the user types in the input field, the onchange event is triggered. This will update the name property with the new value.
Two-way data binding can also be used with other types of UI elements, such as checkboxes, radio buttons, and combo boxes. In each case, the onchange event is used to listen for changes to the UI element and update the corresponding property in the component.
One-way vs Two-way data binding in LWC
The main difference between these two is that one-way binding allows changes to a component’s property to update the corresponding UI element, but changes to the UI element do not update the property, whereas two-way binding allows changes to the property to automatically update the UI element, and changes to the UI element to update the property.
In one-way data binding, the value of a component’s property is bound to a UI using curly braces {}, and any changes to the property are automatically reflected in the UI element. But, in case the user interacts with the UI element and changes its value, the property is not automatically updated with the new value.
However, in two-way data binding, changes to the property are automatically reflected in the UI, and changes to the UI are automatically reflected in the property.
Overall, one-way data binding is useful when you want to display a value in a UI element, but don’t need to track changes to the UI element. Two-way data binding is useful when you want to keep a property and a UI in sync with each other, and need to track changes to both.
Concept of Computed Properties in LWC
Computed properties in LWC allow us to define a property whose value is derived from other properties or data. Computed properties are useful when we need to perform a calculation, transform data, or perform some other operation on the data to obtain a new value that we want to display or use in the component.
In LWC, we define computed properties using a getter function, which calculates and returns the value of the property. The getter function takes the component’s state as an input and returns a computed value based on that state. The computed property is then automatically updated whenever the input state changes.
For example, let’s say we have a component that displays a list of items, and you want to display the total number of items in the list. You can define a computed property that calculates the total number of items based on the length of the list:
import { LightningElement, track } from 'lwc';

export default class MyComponent extends LightningElement {
  @track items = ['item1', 'item2', 'item3'];

  get totalItems() {
    return this.items.length;
  }
}
In this example, the totalItems computed property returns the length of the items array, which is automatically updated whenever the items array changes.
Computed properties can also be used to transform data or perform more complex calculations. For example, you could define a computed property that calculates the average value of an array of numbers:
ComputedProperties.js
import { LightningElement, track } from 'lwc';

export default class MyComponent extends LightningElement {
  @track numbers = [1, 2, 3, 4, 5];

  get average() {
    const sum = this.numbers.reduce((a, b) => a + b, 0);
    return sum / this.numbers.length;
  }
}
In this example, the average computed property calculates the sum of the numbers in the numbers array using the reduce method, and then divides the sum by the length of the array to calculate the average value.
Abhishek
Mr. Abhishek, an experienced Salesforce Application Architect with over 8+ years of development experience and 11x Salesforce Certified. His expertise is in Salesforce Development, including Lightning Web Components, Apex Programming, and Flow has led him to create his blog, SFDC Hub.